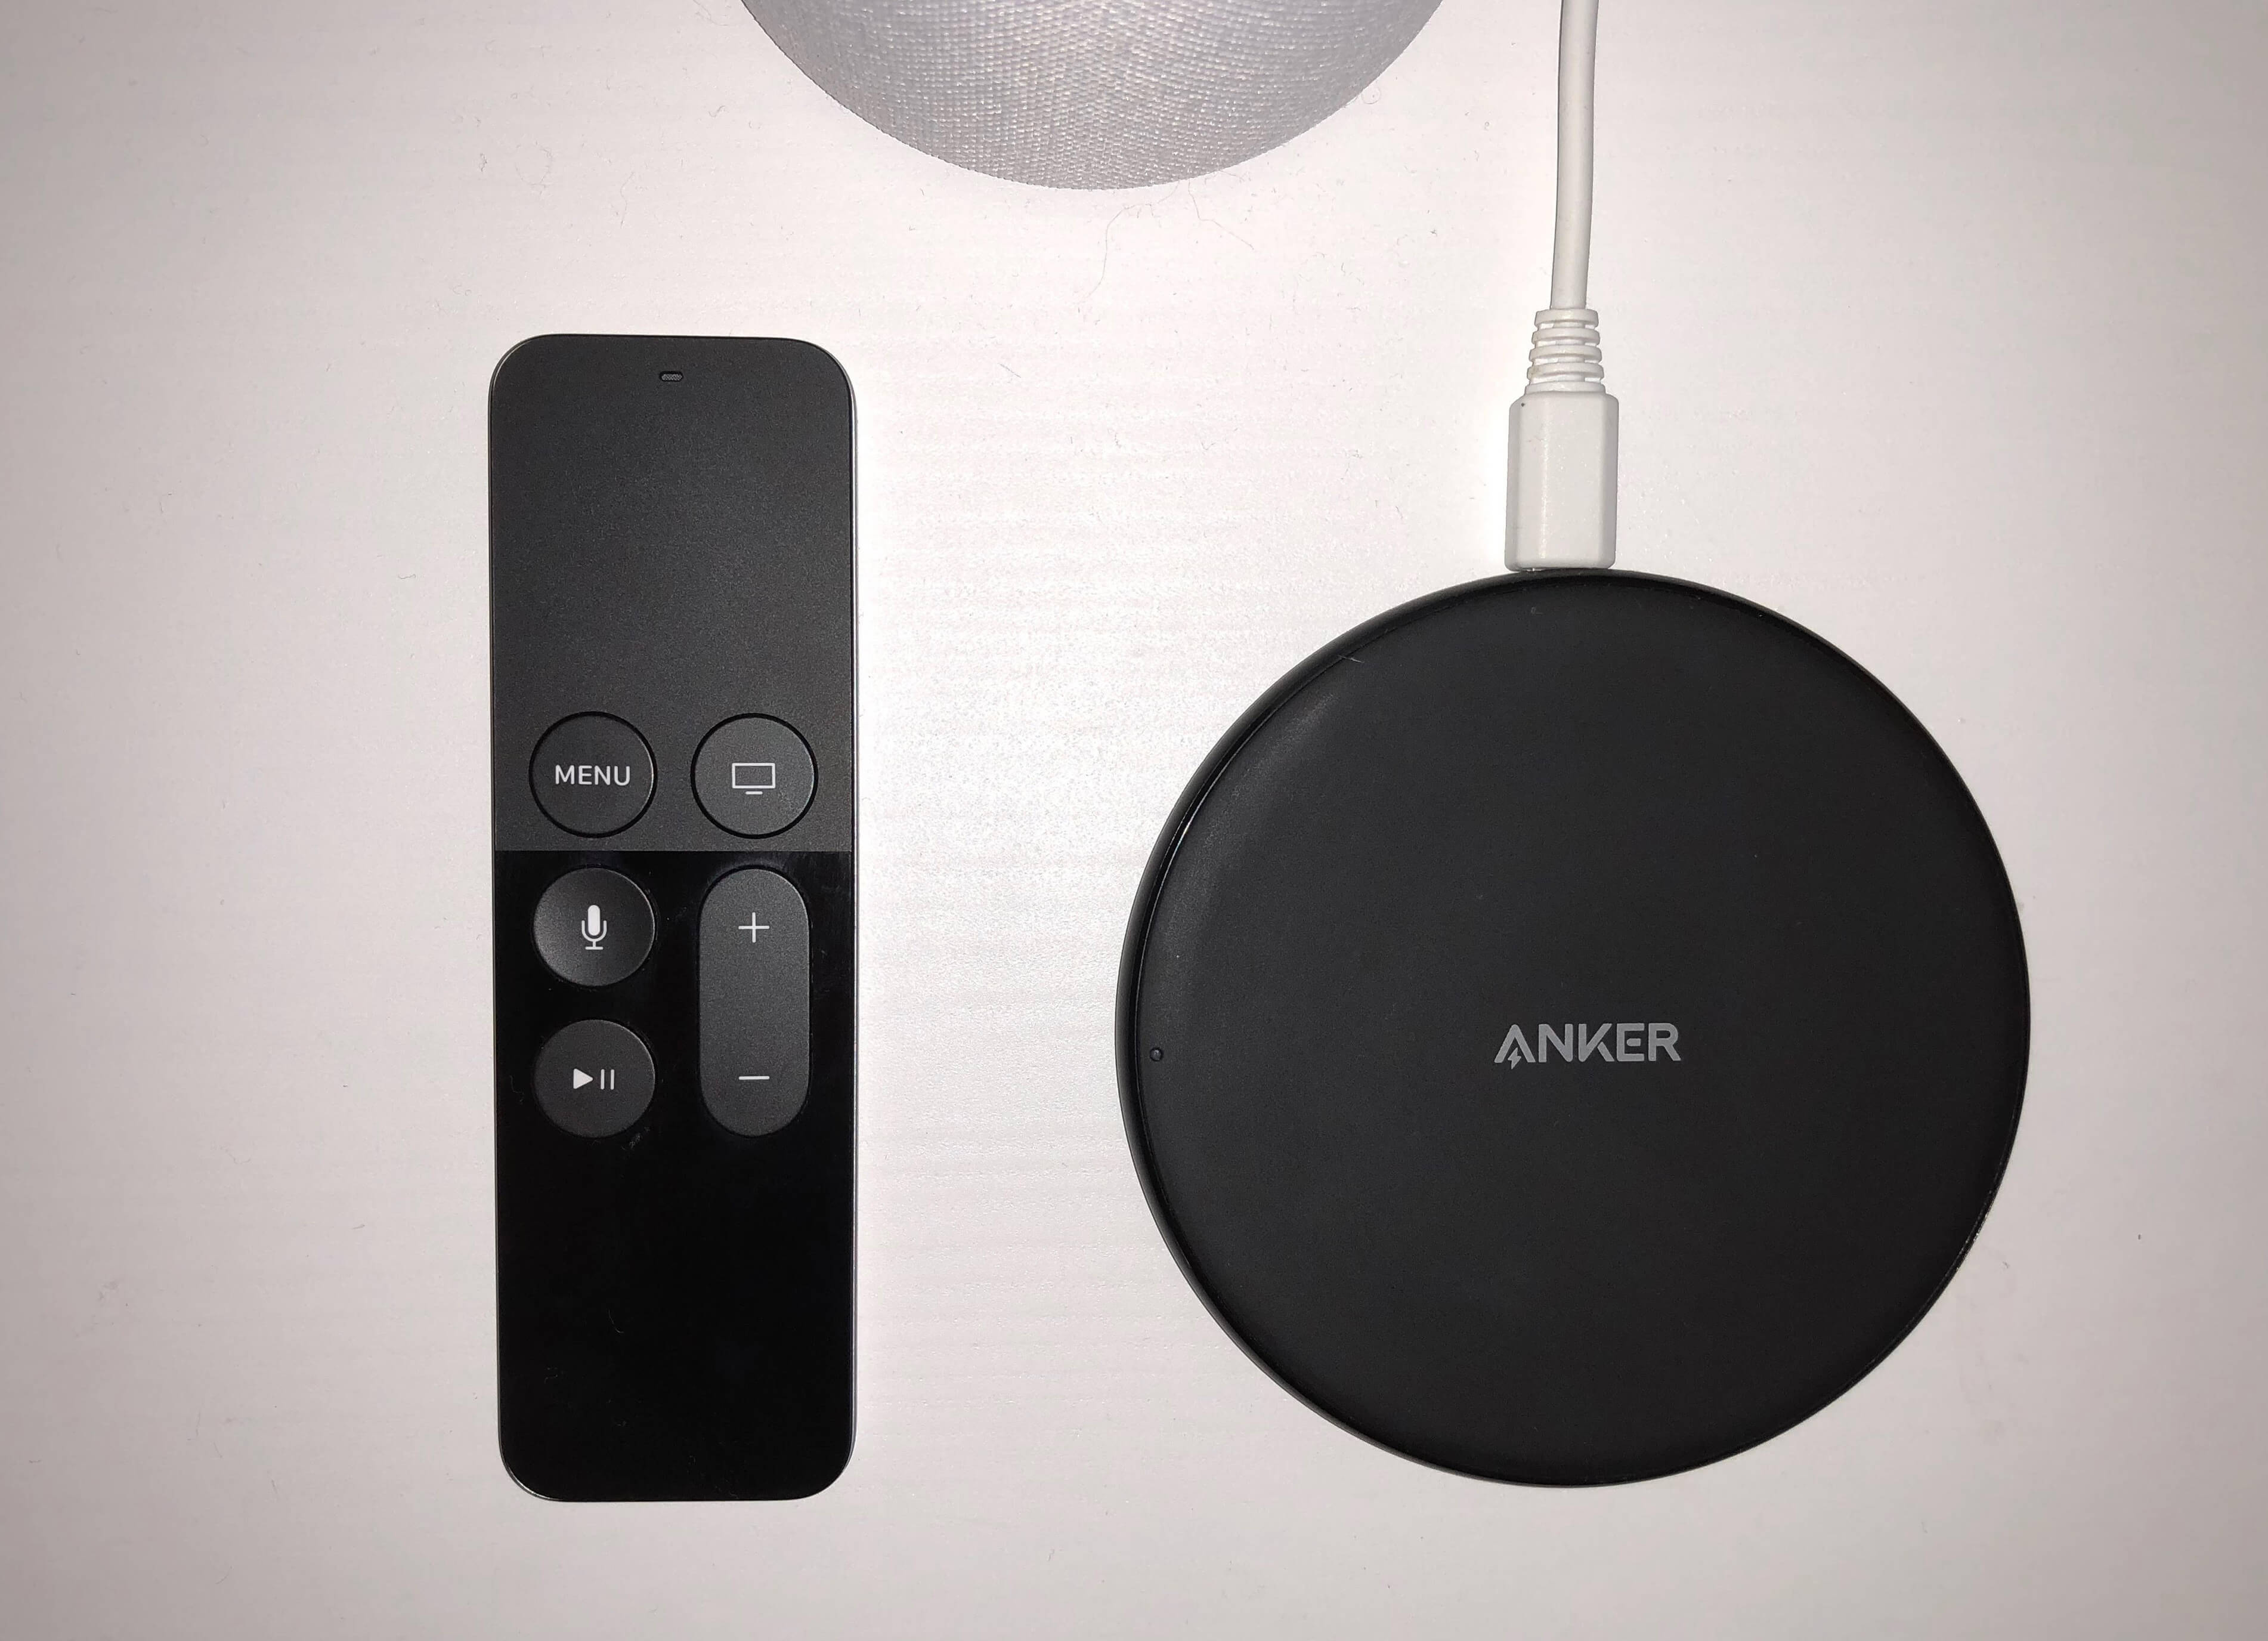
I recently got a new phone that supports wireless charging, allowing me to switch out my rather hefty clock radio dock for a teeny wireless charging pad, continuing the minimalist march in my living room. Things were good until my Apple TV remote needed a recharge, and I had to dig out my old lightning cable anyway.
Apple will likely add wireless charging to the ATV remote eventually, bolstering support for AirPower, but I decided to come up with my own solution in the meantime.
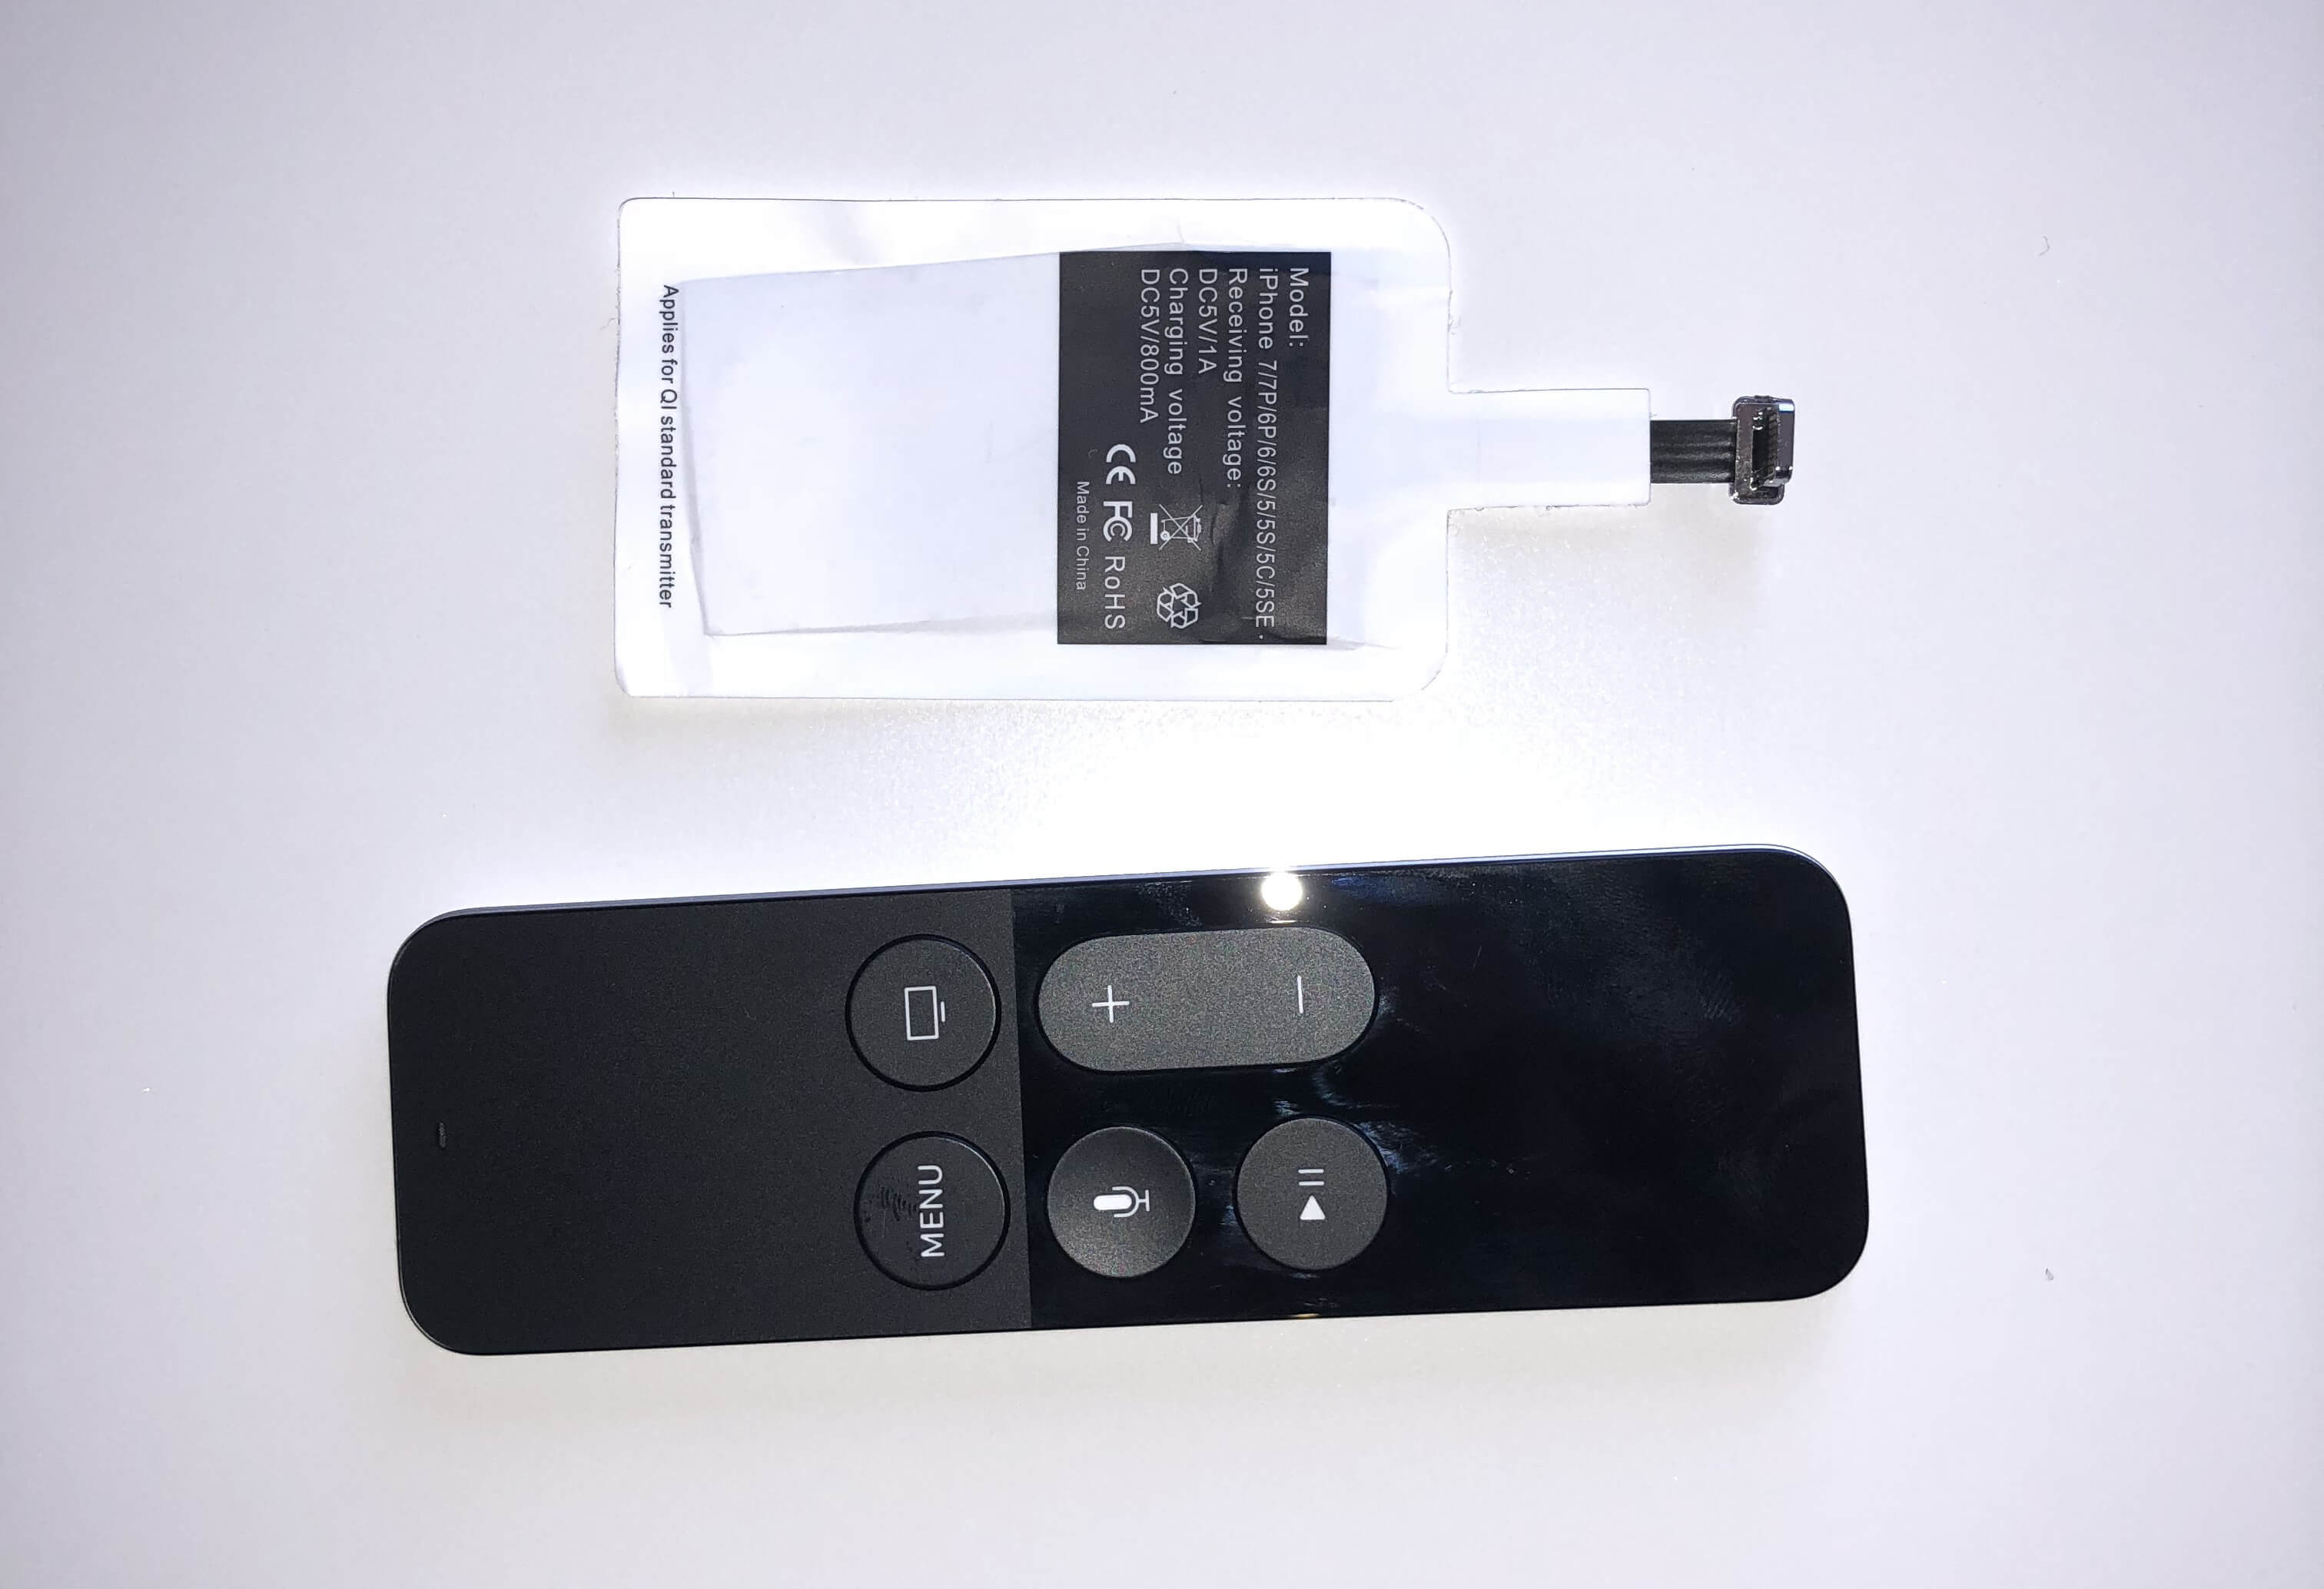
I started with a Lightning to QI wireless charging receiver module, which worked well but didn’t look so great dangling from the remote.
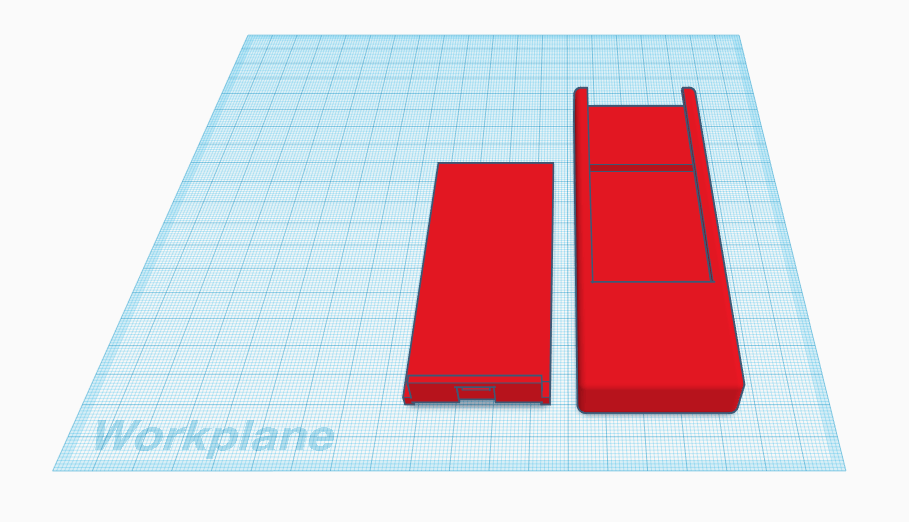
What I needed next was a case to tuck the receiver into. I decided to go the 3D printing route.
After taking some measurements with a caliper borrowed from a friend, I built a 3D model using Tinkercad. I strongly recommend Tinkercad if you’re a beginner, as I was able to get up to speed with it very quickly and accomplish everything I needed.
I started with a basic case shape that had a hollowed out area to tuck the charging receiver into. After a few iterations, I arrived at a case with a separate cover piece that hid away the receiver and allowed the Lightning plug to be snapped into it, exposing only the plug end when the two pieces cases were assembled.
I exported the model and submitted it to Shapeways, a popular 3D printing service. I also got the more basic model printed to compare. About a week later, the pieces arrived.
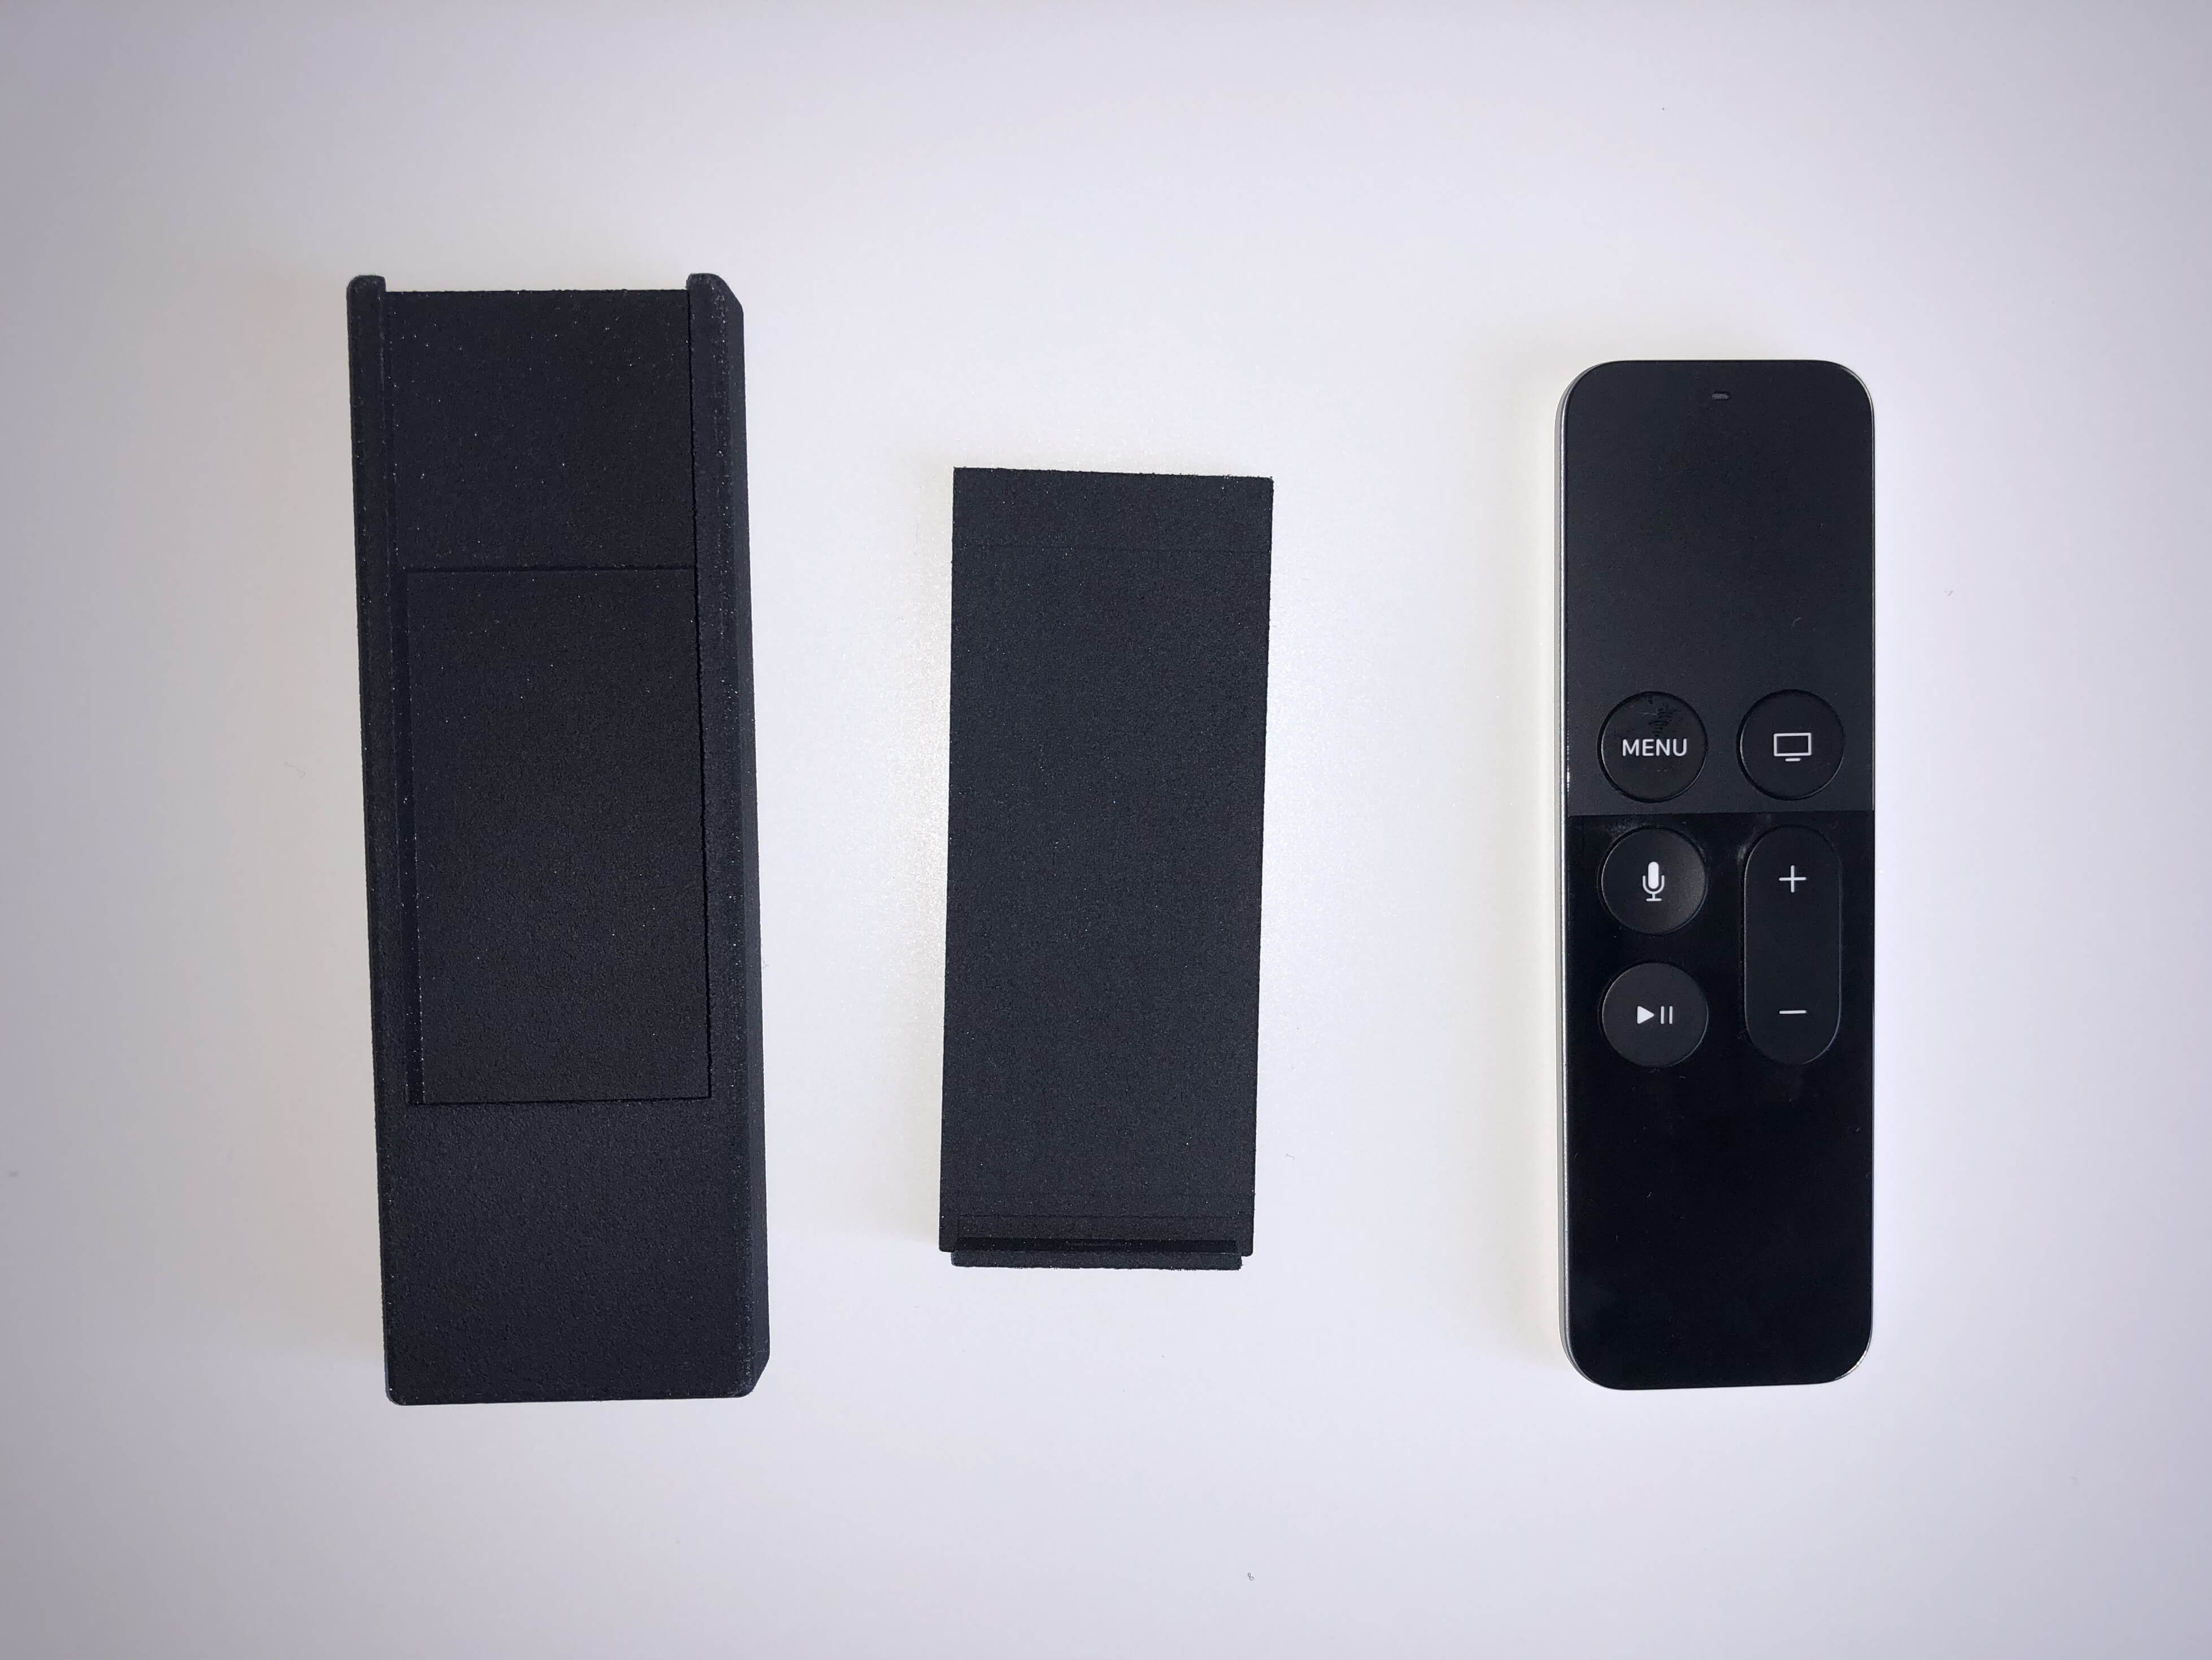
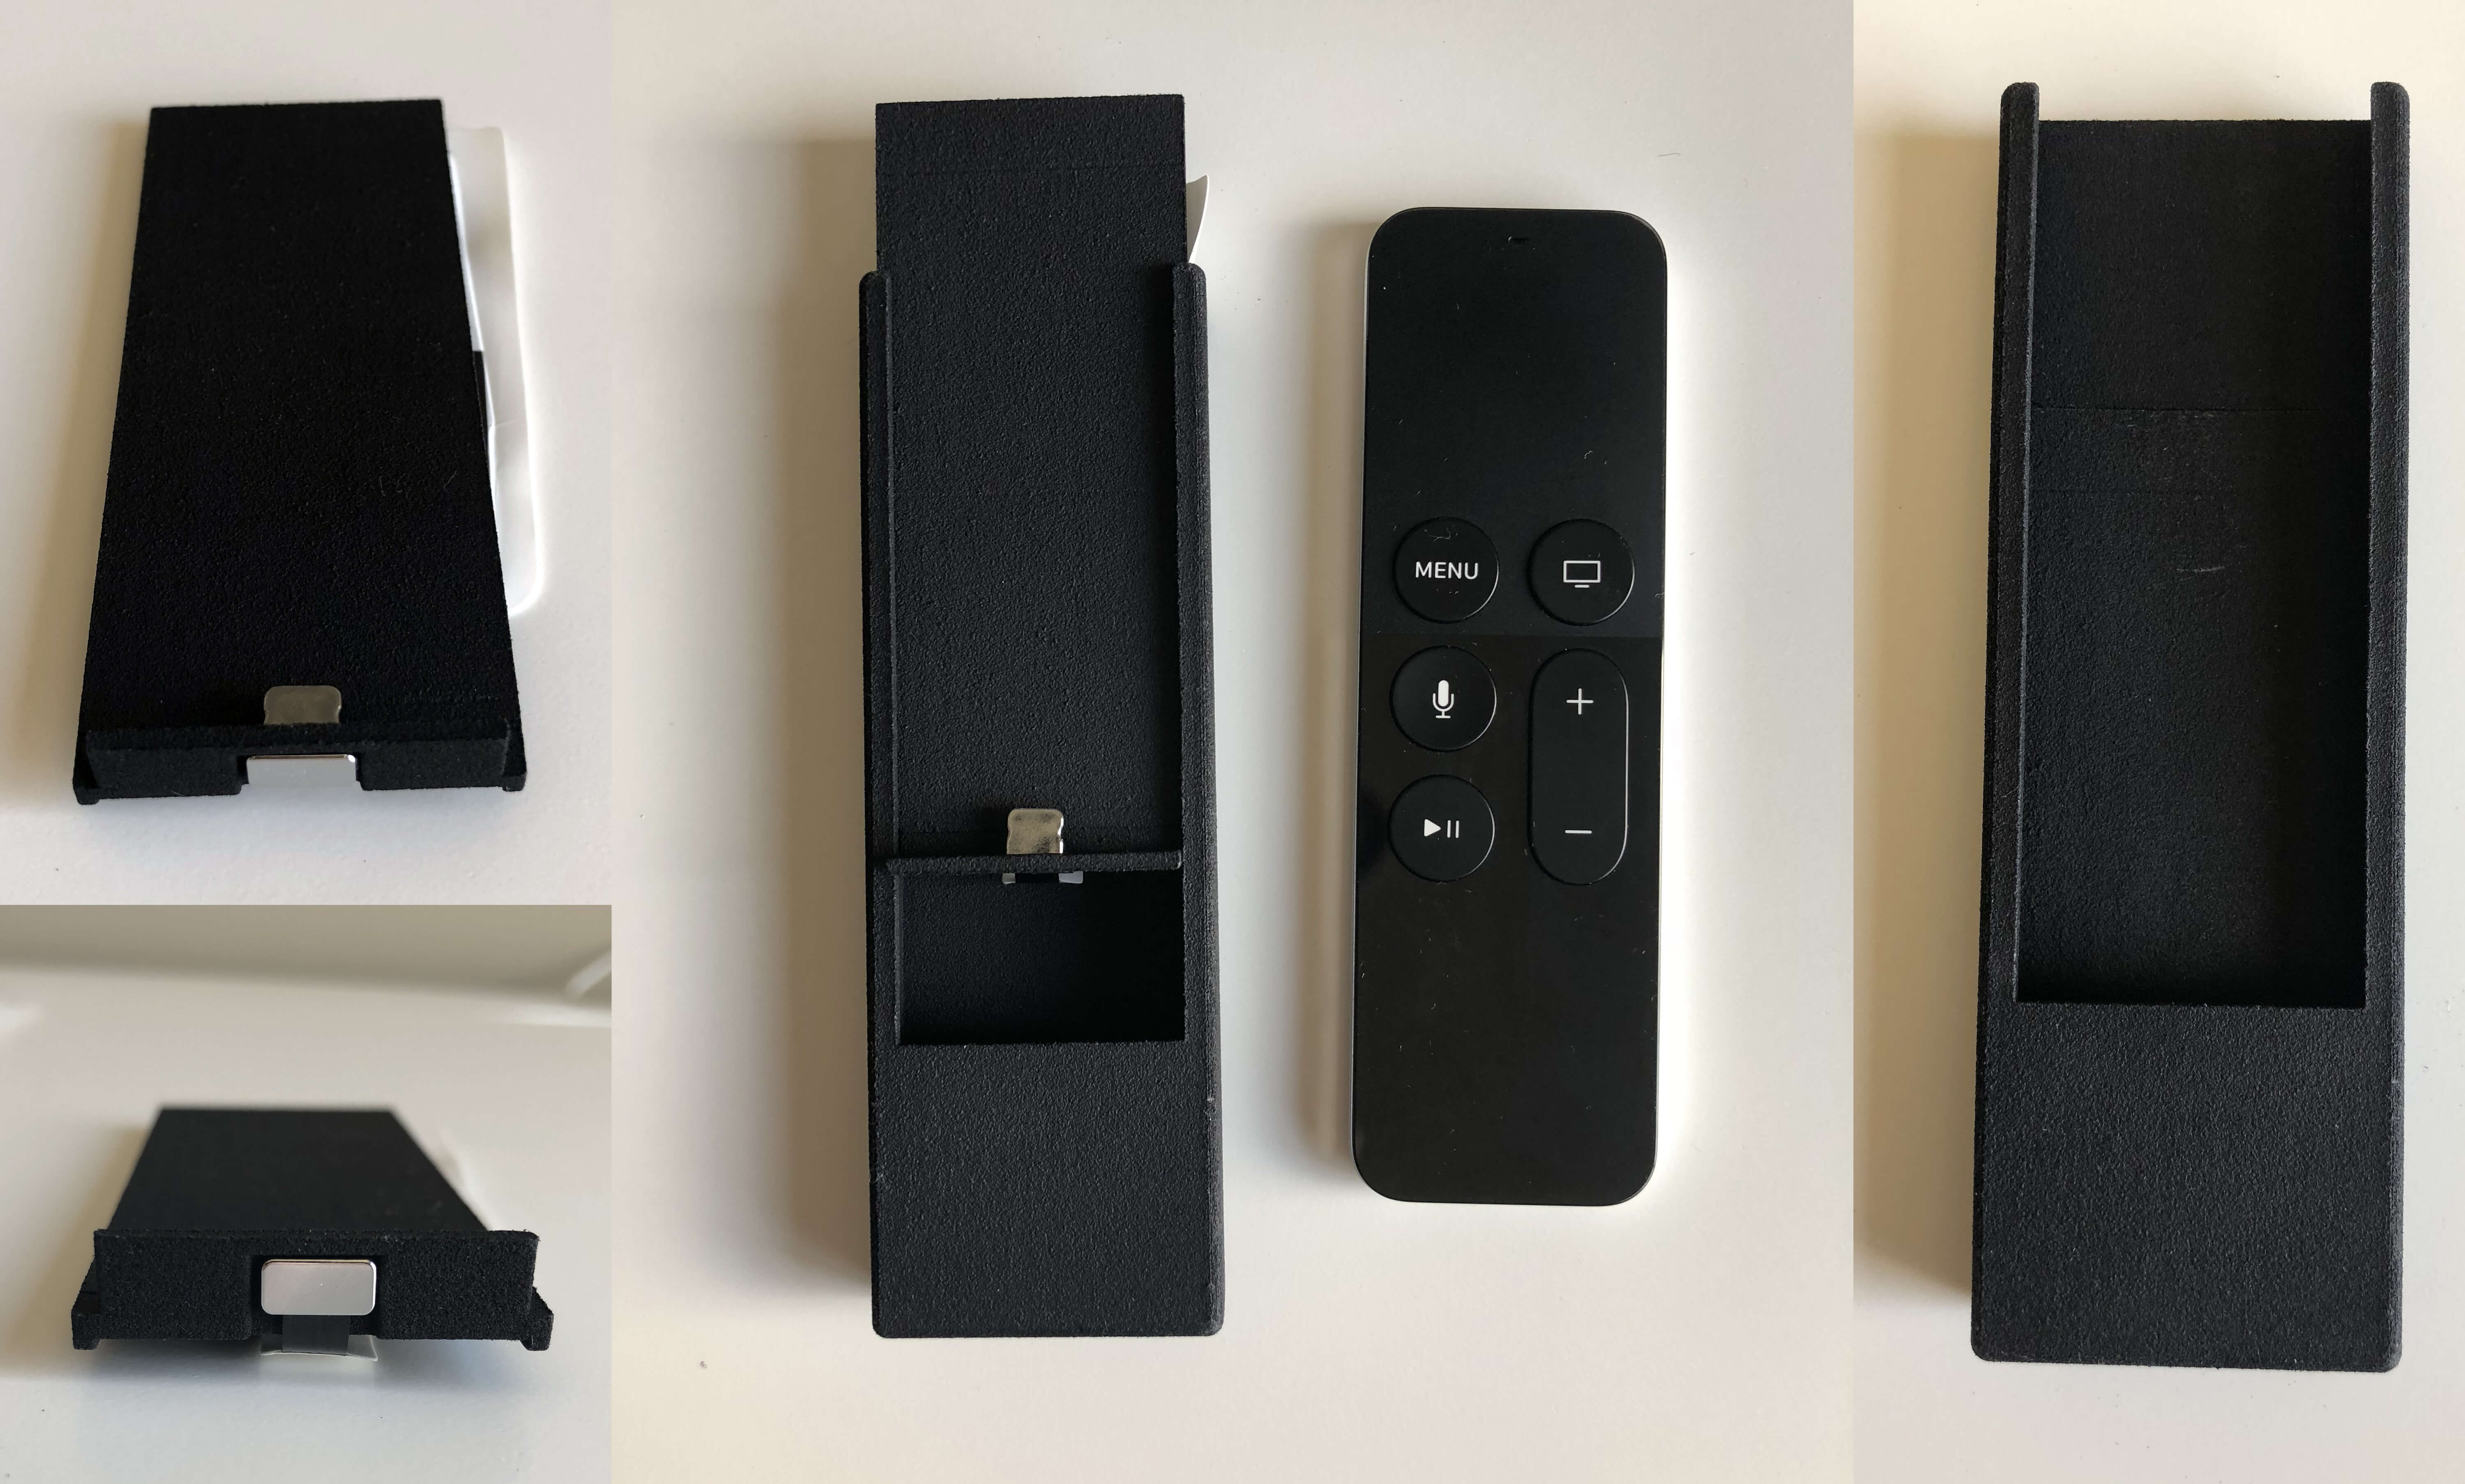
Here’s the assembly. You can see how the charging receiver gets plugged into the cover piece, which then slides into the main piece. The fit between the pieces was snug and the seam barely noticeable.
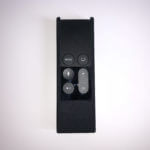
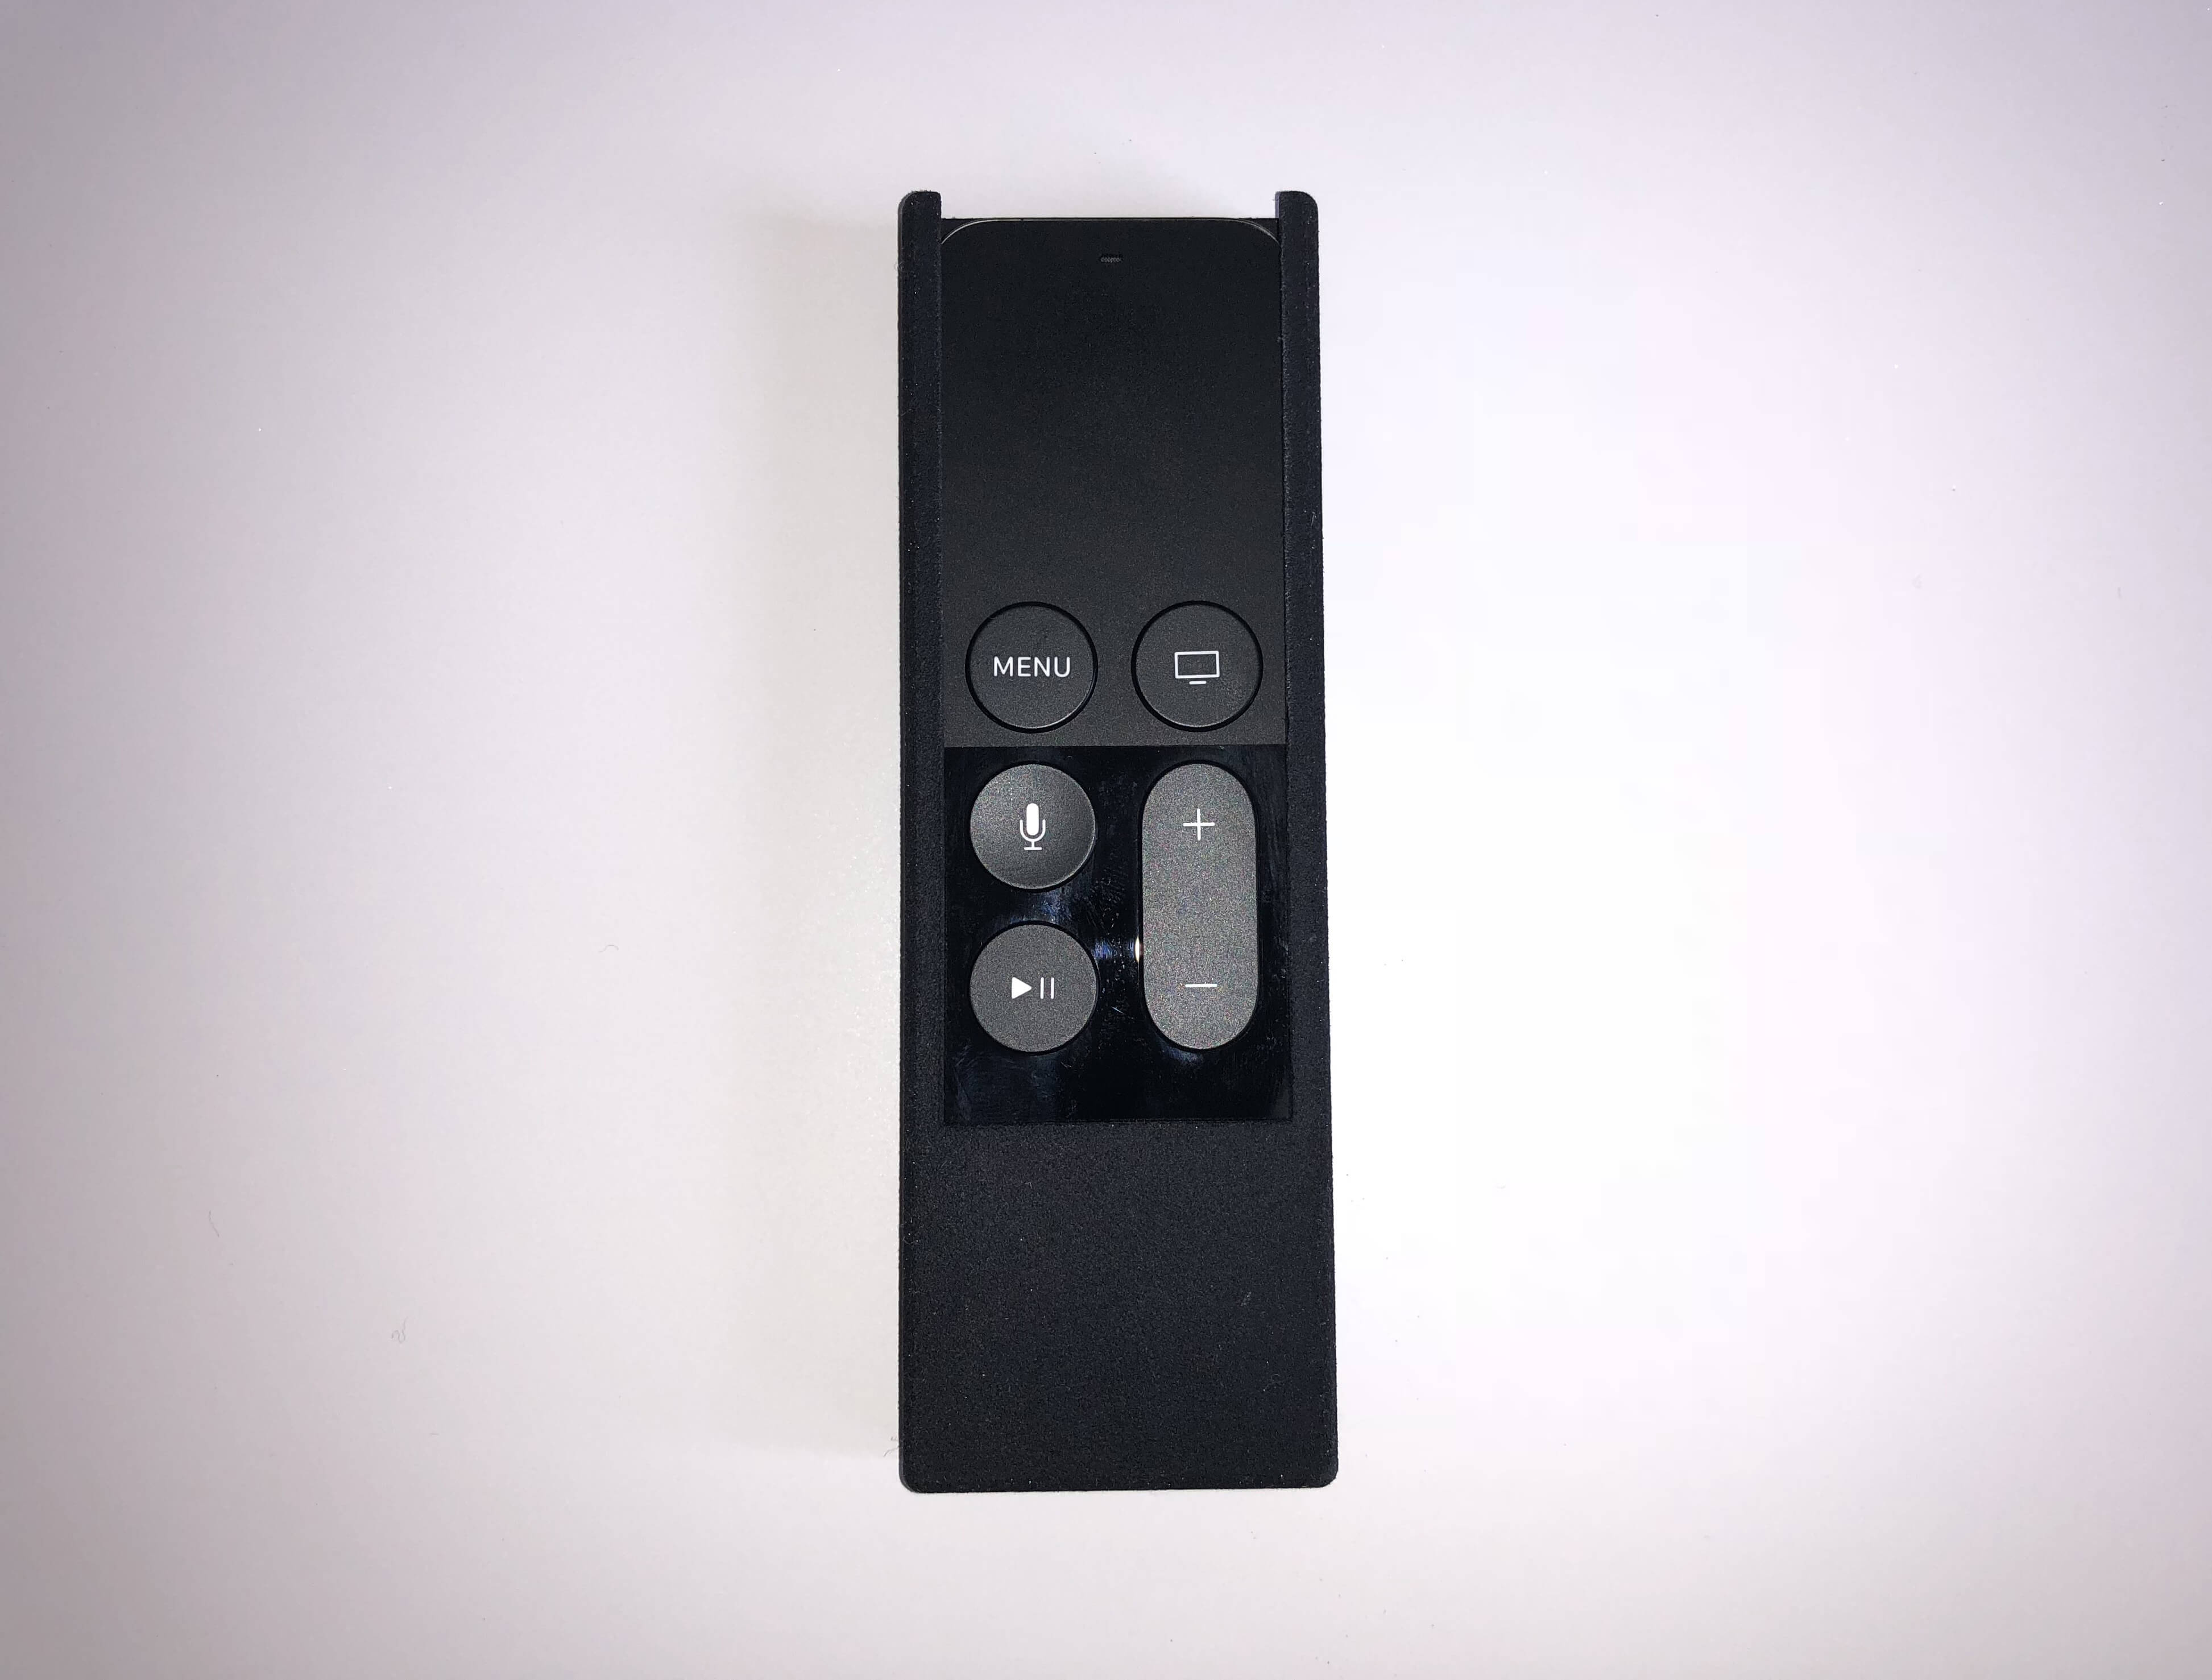
Here’s the final product. Now the lightning cable can be packed away for good.
Notes
Fit
I modeled the case to have tight tolerances between the pieces and the remote. Since this was the first time I used 3D printing, I didn’t know what I was gonna get. The 3D print job was as precise as hoped for, but the tolerances ended up being a bit too tight. Even after sanding down the pieces, the remote was a tight squeeze and required some muscle to remove. For the next version, I’d leave bigger gaps and add little nubs (not sure the right term) inside the case to hold the remote in place instead.
Finish
The texture of the Shapeways pieces wasn’t as rough as other 3D printed works I’ve seen in the past. Still, they were far from the smooth or even matte surfaces you get in commercial products. Finishing them using the methods described in this guide would go a long way.
Financials
Getting the pieces printed by Shapeways was quite pricey. The model could definitely be optimized to reduce the amount of materials used, or if these were to be made in bulk, an entirely different, cheaper process could be taken. But given that this was a one-off project and as much a learning experience as anything else, cost wasn’t a big consideration.
Wow, simple yet elegant design man. I was just looking for something like this on Thingiverse to make use of a Qi module I had laying around from an older iPhone. I tried to find the case on Shapeways but their search is terrible, would you be able to post a direct link to it, or even better post it to Thingiverse for those of us that already have printers? :)
Thanks!
Nicely done!!
Could you please export the TinkerCAD STL file and post it here or on Thingiverse?
Thanks in advance…
Hey! Could you share the cad file?